The installation of OpenECU comes with a number of explanatory examples of how to use OpenECU, including a completed step1 example (see Section 3.3, “Exercise — Step 1”) configured for each supported ECU.
These examples can be accessed through MATLAB's launch pad or start menu. For instance, select the launch pad, browse to the OpenECU selection and click on examples.
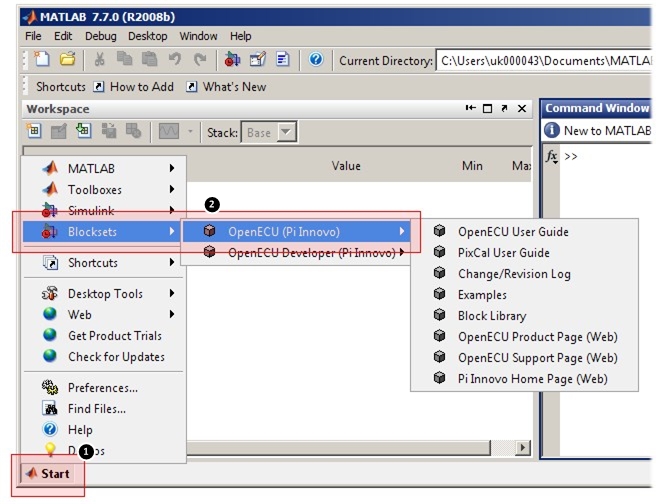
Or with later versions of MATLAB, run the following at MATLAB's command prompt.
oe_examplesThe examples model will open with a series of subsystems:

Open the subsystem of interest and a series of blocks representing the example for at least one ECU will appear.
For each example there is a block that details the loom, or how to connect OpenECU pins to other devices to make the example work. An example or loom specification can be viewed by double clicking or opening the appropriate block.
The available examples are:
- CANdb demo
An example which shows how the CANdb blocks (pcx_CANReceiveMessage and pcx_CANTransmitMessage) of OpenECU can be utilised.
- Extended diagnostics
An example which shows how to use the extended diagnostics library to link diagnostic trouble code, freeze frame, in-use performance ratio and J1939 communication blocks together.
- Fixed Angular demo
An example which shows how the angular functionality of OpenECU can be used to track engine position via crank and cam wheel inputs, and produce fixed pulses for injectors and ignition coils.
- Multi-rate demo
An example which shows how to transfer data between two portions of a model which run at different rates. Simulink has specific rules about how to connect different rates this and the example shows how this can be achieved.
- NVM demo
An example which shows how the Adaptive Parameters (NVM) functionality of OpenECU should be used. This includes two methods accumulating data to be stored (incremental (2d map) or direct (array)) and the additional required blocks to commit the adapted values to NVM.
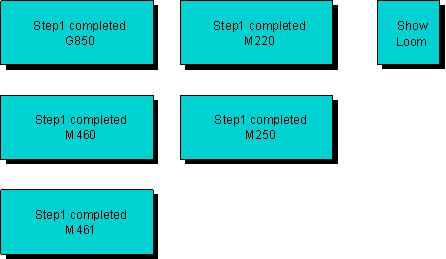
- Step1 completed
A set of completed step1 models for each ECU is available for reference (useful for just trying OpenECU without the need to follow the detailed steps presented later).
- Two pot. demo
A similar example to step1 that shows a simple combination of input reading, processing and output driving.
- Two pot. demo with S-Function
An example with the same functionality as the Two pot. demo but with some of the internal signal processing being achieved by using an S-Function.
Most examples can be run on any ECU. If you find an example but there isn't a corresponding model for your ECU, change the ECU target as described in by the put_Identification block and then adjust any I/O pin selections. If you need a hand, please contact us.