INCA by ETAS GmbH is a calibration tool that can communicate to a CCP compliant device. It provides facilities for calibration, data logging and display and can be used with OpenECU.
The following instructions assume the user is using version 5.1.2. These instructions were transcribed against this version but it may be that these instructions match other versions of the tool.
The instructions also assume that ES 580 CAN card is used. If another communications device is used, the user will need to deviate from these instructions.
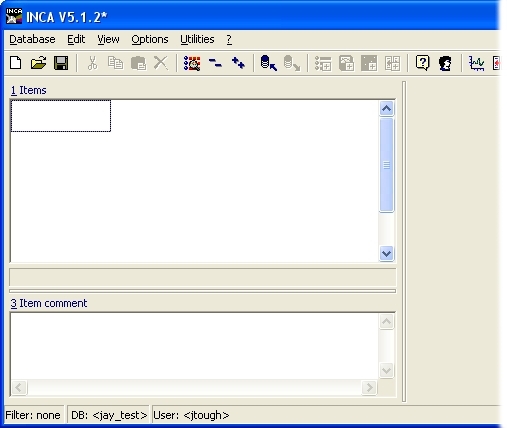
Start INCA and you will be presented with a window similar to the following:
Select the menu option Database->New to create a new database. This database will contain the binary image of the built application and calibration and other items used to calibrate the OpenECU device.
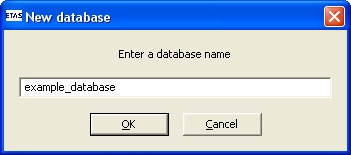
Type in a suitable name: the example here uses example_database and select OK.
Next, select the menu option Edit->Add->ECU Project (a2l) and browse to your built application, e.g.,
step1_tool_inca.a2l. The example shows an olderstep1_r12_g800application.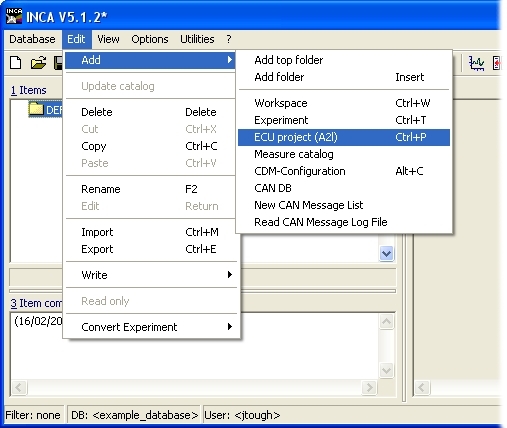
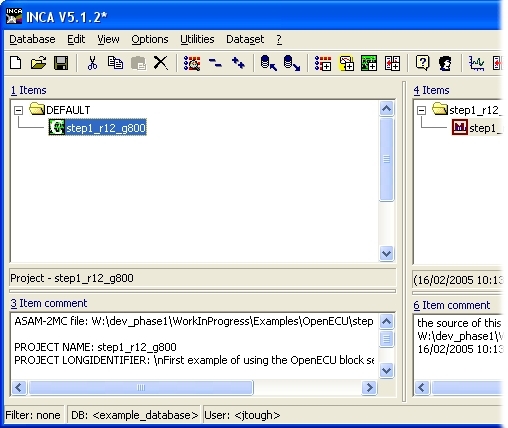
Once loaded, the INCA main window updates.
Next, select the menu option Edit->Add->Workspace and accept the default name, then select the menu option Project->Add Project/Dataset:

and a new dialog appears. Select the project you just added then OK. The main window will have updated to show the project in window 5.
Select the offline item in window 5, then select device->new device
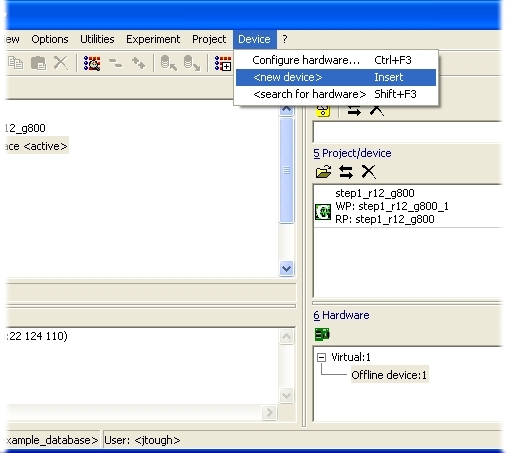
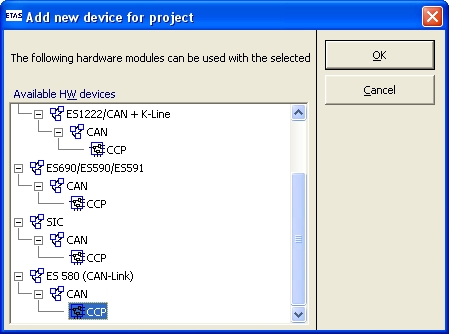
Select an appropriate CCP compatible device. In this example, the PC running INCA has a ES 580 CAN card attached, so the related CCP item is selected.
Next, double click on the workspace item in window 1. If there is an error in the CCP configuration or in the wiring to the OpenECU device, the INCA log window will show that INCA could not communicate with the OpenECU device. If this occurs, check the CCP settings and wiring.
If the memory pages dialog does not pop-up, the select the menu option Hardware->Manage memory pages
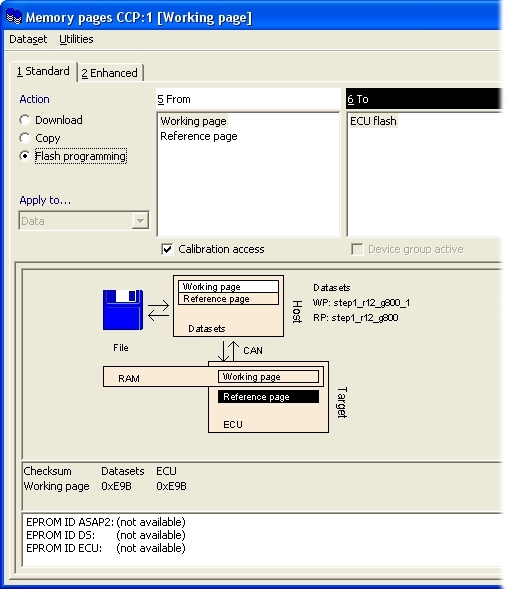
Select Flash programming, then do it. If this is the first time INCA has been used or if OpenECU was installed without the option to Patch INCA, you will be asked to browse to a ProF configuration file.
Note
The INCA tool makes a distinction between the base calibration (reference page) and a derived calibration (working page). Be sure to download the reference page to start with.
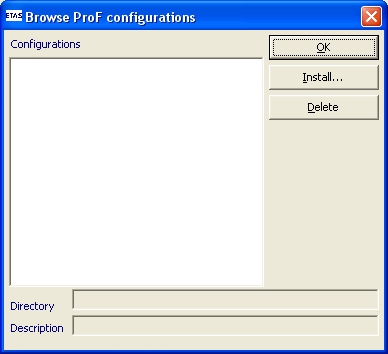
Select the "Install..." button and browse to the install location of OpenECU,
.../tools_integration/inca_profand select OK.This will have installed the INCA ProF configuration file for OpenECU. Select it then OK.
This brings up the ProF settings dialog.

Select Flash strategy and calibration (or Flash strategy, calibration and tunes if using Tunes in your application — the
step1application does not use Tunes), then OK.Note
In order to reprogram or Flash the OpenECU device, the OpenECU device must be in reprogramming mode. For details on how to enter reprogramming mode refer to Section 4.5, “Programming an ECU”.
This brings up the ProF control flow dialog box which shows the progress of programming the OpenECU device.

Press Close when it has finished and Close in the manage memory pages dialog.
Next, to view a measurable, select the menu option Variables->Select...

and from the dialog that pops up, select those signals or calibrations to view. Here, the
stp_ect_statesignal has been selected and will be updated every 100 milliseconds.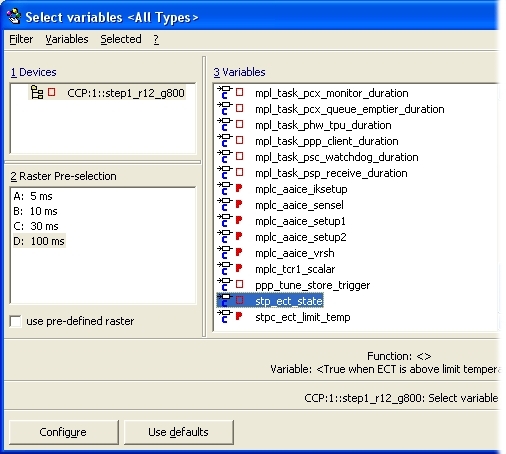
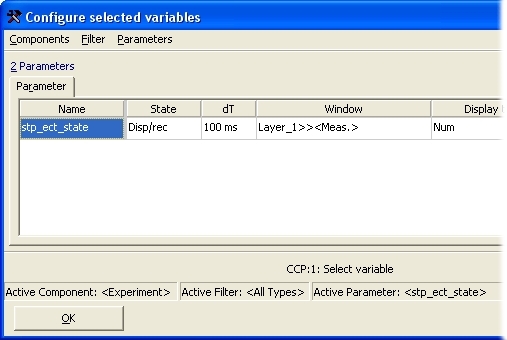
Select the Configure button, followed by the OK button on the next dialog.
Finally, to display the data of the selected item in real-time, select the menu option Measurement->Start Visualisation. You will be presented with the current value of
stp_ect_statein real-time.
At this point, you have managed to connect ETAS INCA to OpenECU,
download the step1 application and view one application signal in
real-time. Please refer to the ETAS INCA user manual for more details
about how to use INCA.